La limandi
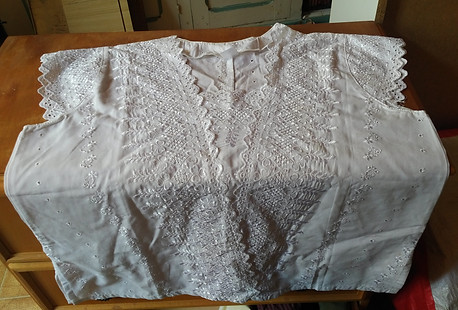
Hello everyone, recently I modified a little top that I got (guess where ??) iat Mathusalem because it had small rust spots; and I thought I could show you that we could save clothes that we would otherwise throw in the trash.
from rust to ruffle
I had taken this top for the little embroidery and I just wanted to modify it without even knowing that there were spots and when I saw them, it motivated me even more.
The solution to the spots problem is not a national secret or a mystery: it is dyeing (yes I know it seems obvious but we do not think about it so often).
You can opt for natural dyes (with food from your closets like coffee, tea, red cabbage, plants ...) or those you find in shops which I did.
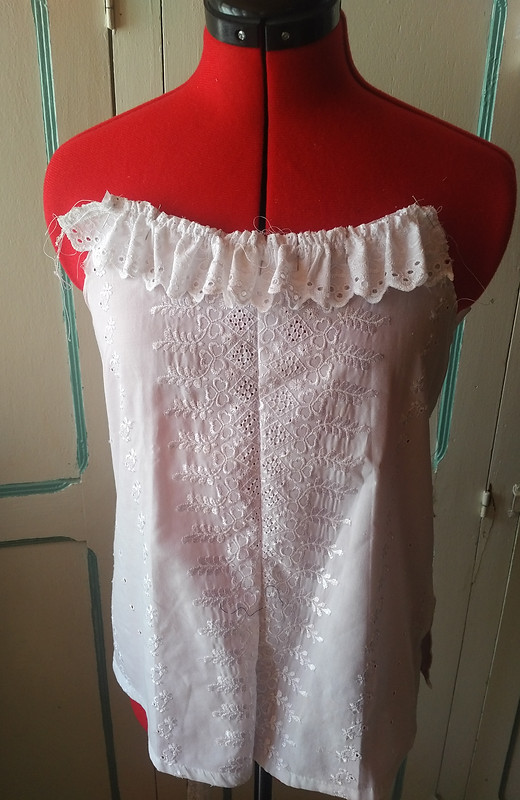
Before changing the color, I unsewed the sleeves and the piece from the chest. I cut strips in the sleeves that I assembled together to create a large one.
I sewed a line in the middle of the front and cut the neckline to make a new one, keeping the armhole line since I still needed it for the rest of the seam.
With the strip, I created a gathering by sewing a line (with the tension at zero and the longest line length) and pulling one of the thread along that seam. I pulled until the band was the same length as the new neckline, then I sewed it to this one.
All I had to do was to sew the finishing of the décolleté and of the (under) arms. For that I chose a thin and purple bias tape that (in my opinion) will go well with the dye I had chosen.
I first sewed the bias on the décolleté in front and in the back, then I took out my double needle to finish assembling it (also to make it pretty) with the white thread sewing the fabric and the purple thread sewing the bias.
I had seen a lot of videos in which the double needle was used to sew the bias but had never tried to do it (since the bias sewing was a nightmare for me, I did not think i’d have the skills) .And in fact, it is much easier: it locks the bias inside the garment (since we are not going to lie, the bias is never perfectly right eh, do not lie, I know it’s not
), and that adds a little professional touch to the garment (I'm a professional ok?).
Oh well, I leave you alone with my little blablas on the needles (well it is still my blog sooo ...).
Once the bias was laid in front and back, I measured the size of i needed for the shoulder straps and added the armhole fabric measurement and two cms for the seam allowance. I started to sew at the seams of the armpits and stopped as soon as the fabric stopped, and this on both sides of the armhole. Once that was done, I closed the bias to create the straps.
I am rather thrilled with the result even if I made a small and darker dye spot on one armpit (but it is hardly visible so it does not bother me). I like the style of this top, it can be worn with jeans and sneakers as much as with a long skirt or mini shorts. In short, versatile.
If you are interested in this little top, it will soon be available on my shop Etsy (I will make an article when everything will be ready). It's a 36/38 (french size).




Then I dyed it. By dyeing it, I hoped that the embroidery would remain white and the fabric would be darker, but in fact everything was dyed and the embroidery even took more than the fabric. In the end, the only thing left white is the white thread I used.
